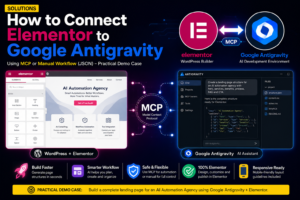
Many WordPress creators are now asking the same question: how can I connect Elementor to Google Antigravity?
The idea is simple. Elementor helps you visually build WordPress pages, while Google Antigravity can help you plan, generate, structure, and automate parts of your website workflow with AI.
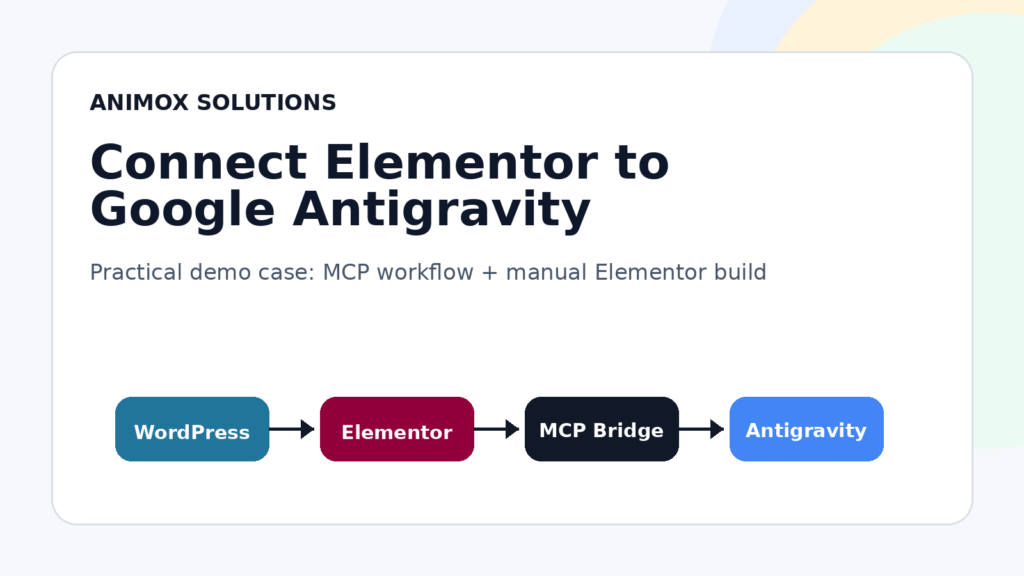
But there is one important thing to understand first: in most cases, Elementor and Google Antigravity do not connect with a simple one-click button. Instead, you can use one of two practical workflows.
The first option is the MCP workflow. This is better for advanced users who want Google Antigravity to communicate with a WordPress environment through a connected MCP setup.
The second option is the manual workflow. This is better for beginners who want Antigravity to generate the page structure, copy, layout plan, and prompts, then manually build the final page inside Elementor.
Method 1: Connect Elementor to Google Antigravity Using MCP
MCP stands for Model Context Protocol.
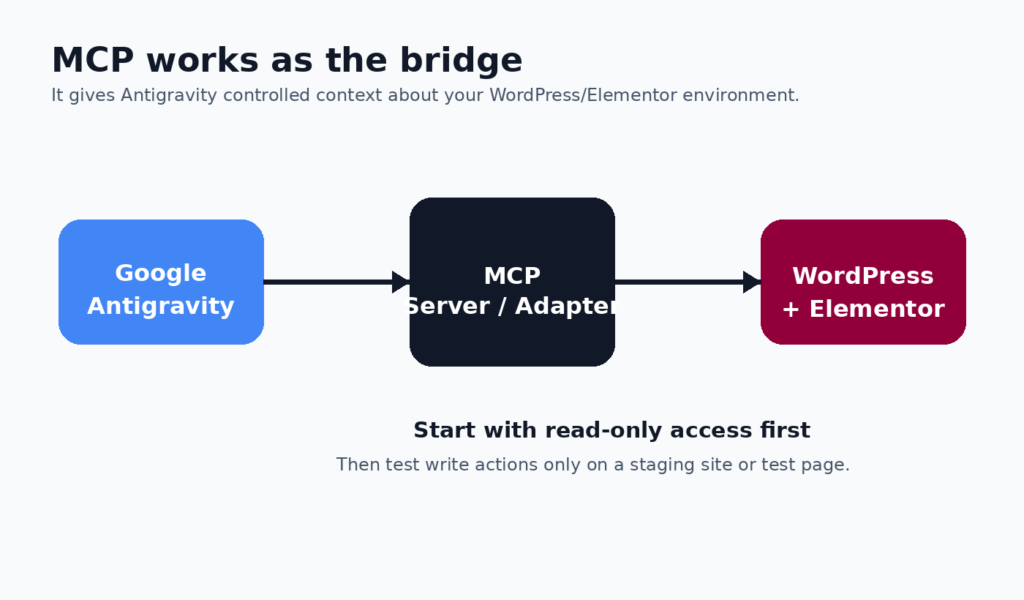
In simple words, MCP works like a bridge between an AI tool and another system. In this case, MCP can help Google Antigravity communicate with your WordPress environment.
Normally, an AI tool cannot automatically see your WordPress pages, Elementor layouts, or website structure. It can generate text, ideas, or code, but it does not know what exists inside your website unless you give it a secure way to access that context.
This is where MCP becomes useful. With the right setup, it can allow an AI assistant to read information from your WordPress site, understand available pages, and in some cases prepare or update content depending on the permissions you give it.
Step 1: Prepare Your WordPress Website
Before connecting anything, open your WordPress dashboard and make sure Elementor is installed and active.
Go to:
WordPress Dashboard → Plugins → Installed Plugins
Check that Elementor is installed and activated. If you use Elementor Pro, make sure Elementor Pro is also active and connected correctly.
You should also make sure your website is working correctly and that you have admin access.
Important: do not test automation directly on your live homepage. Create a test page or use a staging website first.
Step 2: Create a Test Page in WordPress
Now create a test page where you can safely experiment.
Go to:
WordPress Dashboard → Pages → Add New
Name the page:
AI Automation Landing Page Test
This page will be used for the demo workflow. The goal is to test the process without touching an important live page.
Do not publish the final page until you have reviewed everything manually inside Elementor.
Step 3: Configure the MCP Layer
To connect Antigravity with WordPress, you need an MCP-compatible setup.
Depending on your technical environment, this may involve a WordPress MCP Adapter, an MCP server, an Elementor-compatible MCP plugin, an authentication token, a local or remote endpoint, and specific read or write permissions.
For your first test, it is better to start with read-only permissions if possible. This reduces risk and lets you confirm that Antigravity can access your WordPress environment before allowing it to modify anything.
The goal at this stage is simple: confirm that Antigravity can safely understand or read the WordPress environment.
Step 4: Add the MCP Server to Google Antigravity
Open Google Antigravity and go to the MCP or integrations settings.
Add your MCP server details. This may include the server name, endpoint, authentication token, transport type, permissions, and environment configuration.
After saving the settings, restart or refresh Antigravity if needed.
Once the MCP server is connected, you can begin with a simple read test.
Step 5: Test the Connection
Before asking Antigravity to create or edit anything, test if it can read your WordPress pages.
Use this prompt:
Check if you can access my WordPress site through the MCP connection.

List the available pages and identify the page called:
“AI Automation Landing Page Test”.

Do not edit anything yet. Only confirm read access.
If the connection works, Antigravity should return a list of available pages or confirm that it can access the test page.
If it fails, check the MCP endpoint, authentication token, WordPress permissions, hosting firewall, plugin configuration, and Antigravity MCP settings.
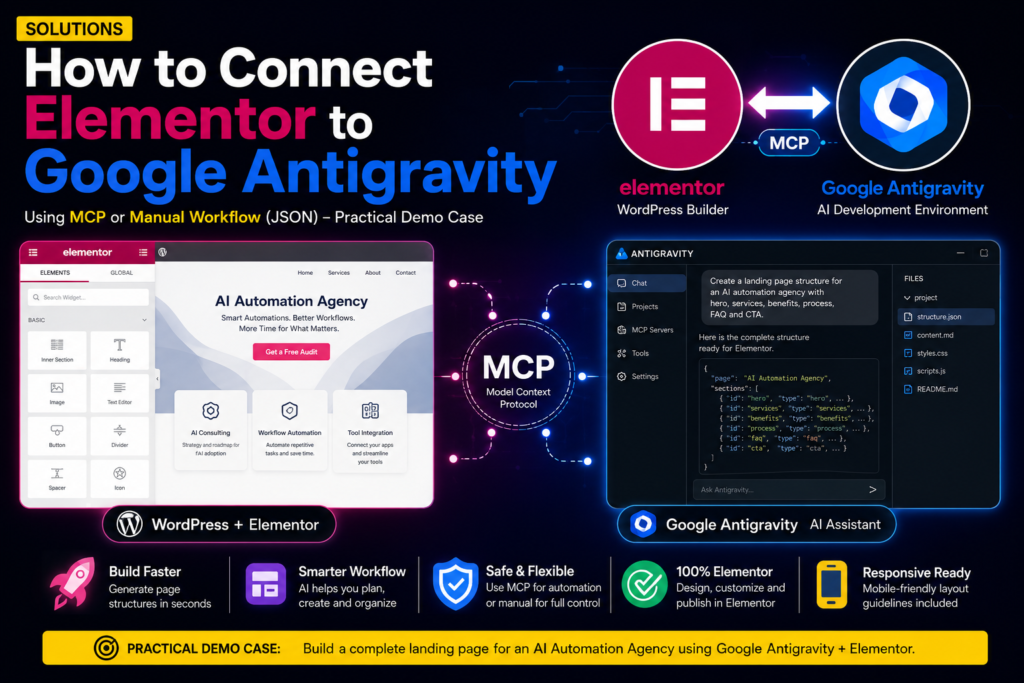
Step 6: Ask Antigravity to Generate the Landing Page Structure
Once the connection works, ask Antigravity to generate the landing page structure.
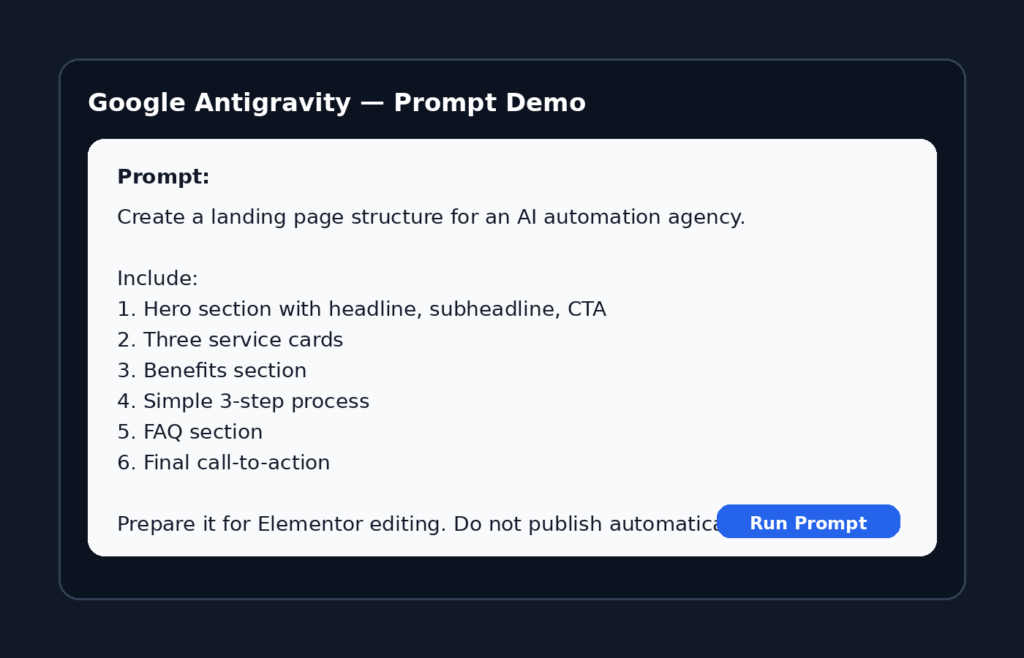
Use this prompt:
Create a landing page structure for an AI automation agency.

The page should include:

1. Hero section with headline, subheadline, and CTA button
2. Services section with 3 service cards
3. Benefits section
4. Simple 3-step process section
5. FAQ section
6. Final call-to-action section

Prepare the structure so it can be reviewed and edited inside Elementor.

Keep the layout clean, modern, and conversion-focused.
Do not publish the page automatically.
This prompt is specific because it tells the AI what type of page you want, what sections to include, how the output should be used, and what action not to take automatically.
Step 7: Review the Generated Structure
After running the prompt, Antigravity should generate a structure similar to this.
Example output:
Page: AI Automation Agency Landing Page

1. Hero Section

Headline:
Automate Your Business Workflows with AI

Subheadline:
Save time, reduce manual work, and scale faster with custom AI automation systems.

CTA:
Book a Free Workflow Audit

2. Services Section

Service 1:
AI Consulting

Service 2:
Workflow Automation

Service 3:
Tool Integration

3. Benefits Section

Benefit 1:
Save Time

Benefit 2:
Increase Productivity

Benefit 3:
Scale Faster

4. Process Section

Step 1:
Audit Your Workflow

Step 2:
Build the Automation

Step 3:
Launch and Optimize

5. FAQ Section

Question 1:
Do I need technical skills?

Question 2:
How long does setup take?

Question 3:
Can this work with my existing tools?

6. Final CTA

Headline:
Ready to Automate Your Daily Tasks?

Button:
Start Your Free Audit
This output is not the final page. It is only a first draft. You should review it, improve the copy, and then build the final layout inside Elementor.
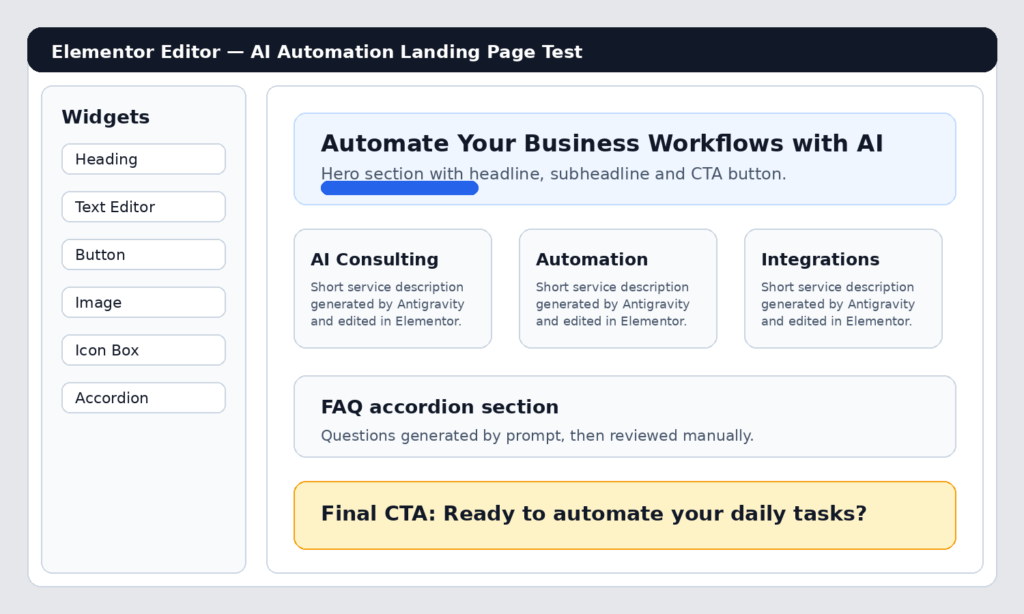
Step 8: Open the Page in Elementor
Now open your test page in Elementor.
Go to:
WordPress Dashboard → Pages → AI Automation Landing Page Test → Edit with Elementor
Start building the layout using Elementor widgets.
For the hero section, you can use a Heading widget, Text Editor widget, Button widget, and Image widget or background image.
For the services section, you can use containers, Icon Box widgets, Heading widgets, and Text widgets.
For the FAQ section, you can use the Accordion widget, Toggle widget, or simple text blocks.
For the final CTA section, use a strong heading, short support text, and a clear button.
Step 9: Customize the Design
After adding the structure, customize the design inside Elementor.
Focus on spacing, typography, button style, section background, mobile layout, image placement, CTA visibility, and brand colors.
Antigravity can help you with structure and content, but Elementor should be used for final visual control.
The best workflow is to let AI create the first draft, then use your design judgment inside Elementor.
Step 10: Compare Before and After
Before using this workflow, the page is empty. You have to think about the structure, copy, sections, CTA, and layout manually.
After using Antigravity, you get a clear page plan that can be built inside Elementor faster.
Before:
Blank Elementor page
No section structure
No headline
No CTA
No service descriptions
No FAQ
After:
Complete landing page draft
Hero section
Services section
Benefits section
Process section
FAQ section
Final CTA
Ready for Elementor customization
This is the real value of the workflow. Antigravity helps you avoid starting from zero, while Elementor gives you full control over the final design.
Method 2: Manual Workflow Without MCP
If MCP setup feels too technical, use the manual workflow.
This is the best method for beginners. In this workflow, Antigravity does not directly connect to WordPress. Instead, it helps you generate the plan, copy, sections, widgets, and design instructions. Then you manually build the page inside Elementor.
This method is safer because the AI does not edit your website directly.
Step 1: Ask Antigravity for an Elementor Blueprint
Use this prompt:
Create an Elementor landing page blueprint for an AI automation agency.

Return the result section by section.

For each section, include:

- Section name
- Goal of the section
- Suggested Elementor widgets
- Heading copy
- Body copy
- CTA text if needed
- Layout notes
- Mobile design notes

The page should be clean, modern, and conversion-focused.
This gives you a complete build plan that you can follow manually inside Elementor.
Step 2: Ask for Widget-by-Widget Instructions
After getting the blueprint, ask Antigravity to convert it into Elementor steps.
Use this prompt:
Convert this landing page blueprint into step-by-step Elementor building instructions.

For each section, tell me:

- Which container to create
- How many columns or inner containers to use
- Which Elementor widgets to add
- The exact text for each widget
- Suggested spacing
- Suggested responsive behavior for mobile
This makes the output easier to follow inside Elementor, especially if you are not a developer.
Step 3: Build Each Section Manually
Now open Elementor and build the page section by section.
Example for the hero section:
Section:
Hero

Container:
Full width
Two columns on desktop
One column on mobile

Left column:
Heading widget
Text Editor widget
Button widget

Right column:
Image widget or illustration

Headline:
Automate Your Business Workflows with AI

Subheadline:
Save hours every week by replacing repetitive manual tasks with smart AI-powered workflows.

Button:
Book a Free Workflow Audit
This is a practical and safe way to use AI with Elementor without needing a complex technical setup.
Example Prompt Pack for Elementor and Antigravity
You can copy and use these prompts directly.
Prompt 1: Generate a Landing Page Structure
I want to build an Elementor landing page for an AI automation agency.

Create a complete page structure with:

1. Hero section
2. Services section with 3 cards
3. Benefits section
4. 3-step process section
5. FAQ section
6. Final CTA section

For each section, provide:

- Section goal
- Elementor container structure
- Suggested widgets
- Heading copy
- Body copy
- CTA text if needed
- Layout notes
- Mobile responsiveness notes

Keep the design clean, modern, and conversion-focused.
Prompt 2: Improve the Copy
Improve the landing page copy for a small AI automation agency.

Target audience:
Small business owners, creators, and local service providers.

Tone:
Clear, professional, simple, and practical.

Avoid:
Generic AI buzzwords, exaggerated promises, and complicated technical terms.

Make the copy more persuasive and conversion-focused.
Prompt 3: Generate FAQ
Create an FAQ section for an AI automation agency landing page.

Include 6 questions and answers.

The answers should be short, clear, and beginner-friendly.

Focus on:
- Setup time
- Technical skills
- Supported tools
- Pricing concerns
- Security
- What happens after the first consultation
Prompt 4: Create Elementor Widget Instructions
Turn this landing page structure into Elementor building instructions.

For every section, give me:

- Container layout
- Number of columns
- Widgets to use
- Exact text to paste
- Suggested spacing
- Suggested alignment
- Mobile layout recommendation

Make it easy for a beginner to follow.
Prompt 5: Troubleshoot the Page
Review this Elementor landing page structure and find problems.

Check for:

- Weak headline
- Missing CTA
- Too much text
- Bad section order
- Poor mobile structure
- Generic copy
- Missing trust elements

Then suggest improvements.
Common Problems and Fixes
Problem 1: Antigravity Cannot Access WordPress
If Antigravity cannot access your WordPress website, check your MCP configuration.
Possible causes include a wrong endpoint, missing authentication token, MCP server not running, WordPress permissions issue, or hosting firewall blocking the request.
The best solution is to start with a simple read-only test. Ask Antigravity to list pages before asking it to create or edit anything.
Problem 2: Antigravity Can Read WordPress but Cannot Edit Elementor
This usually means your MCP setup can access general WordPress data but does not expose Elementor-specific actions.
The solution is simple: use Antigravity for structure and copy, then manually build or adjust the design inside Elementor.
Problem 3: The Generated Page Looks Too Generic
If the page sounds generic, the prompt is probably too vague.
Bad prompt:
Create a landing page for my agency.
Better prompt:
Create a landing page for a small AI automation agency that helps local businesses automate repetitive admin tasks.

The audience is non-technical business owners.

Use a simple, trustworthy, and practical tone.

Focus on saving time, reducing manual work, and improving daily operations.

Avoid hype and generic AI buzzwords.
Problem 4: The Elementor Layout Looks Broken on Mobile
AI can suggest layout ideas, but Elementor responsive settings still need manual review.
Inside Elementor, check desktop view, tablet view, and mobile view.
Adjust column stacking, font size, button width, section padding, image size, and text alignment.
Watch the Full Tutorial on YouTube
If you want to see a visual tutorial about this type of workflow, you can check the related YouTube channel:
YouTube Channel: DigiBunker HQ
Channel URL: https://www.youtube.com/@DigiBunkerHQ
This video reference is useful because it gives a visual explanation of how Google Antigravity and Elementor can work together in a practical website-building workflow.
Which Method Should You Use?
Use the MCP workflow if you are an advanced user, understand WordPress permissions, want more automation, are comfortable testing AI workflows, and have a staging environment.
Use the manual workflow if you are a beginner, do not want technical setup, want to stay in control, only need structure and copy, or prefer building manually inside Elementor.
For most users, the best starting point is the manual workflow. Once you understand the process, you can later test the MCP workflow.
Final Recommendation
The best way to use Elementor with Google Antigravity is not to let AI replace your entire design process.
Use Google Antigravity for planning, structure, page copy, section ideas, workflow automation, and prompt-based improvements.
Use Elementor for visual editing, design control, spacing, responsive layout, branding, and publishing.
The safest workflow is:
Antigravity generates the structure.
Elementor builds and polishes the page.
This gives you speed without losing control.
Related Animox Solutions
You may also like:
How to write better prompts for AI website design
How to create an SEO-friendly landing page structure
How to improve WordPress workflows with AI
How to build faster Elementor pages using automation
How to use AI tools without breaking your website layout
Final CTA
Want more practical AI, SEO, email, and automation workflows?
Explore the Animox Solutions Hub for step-by-step guides, real use cases, and practical tools built for creators, marketers, and website owners.